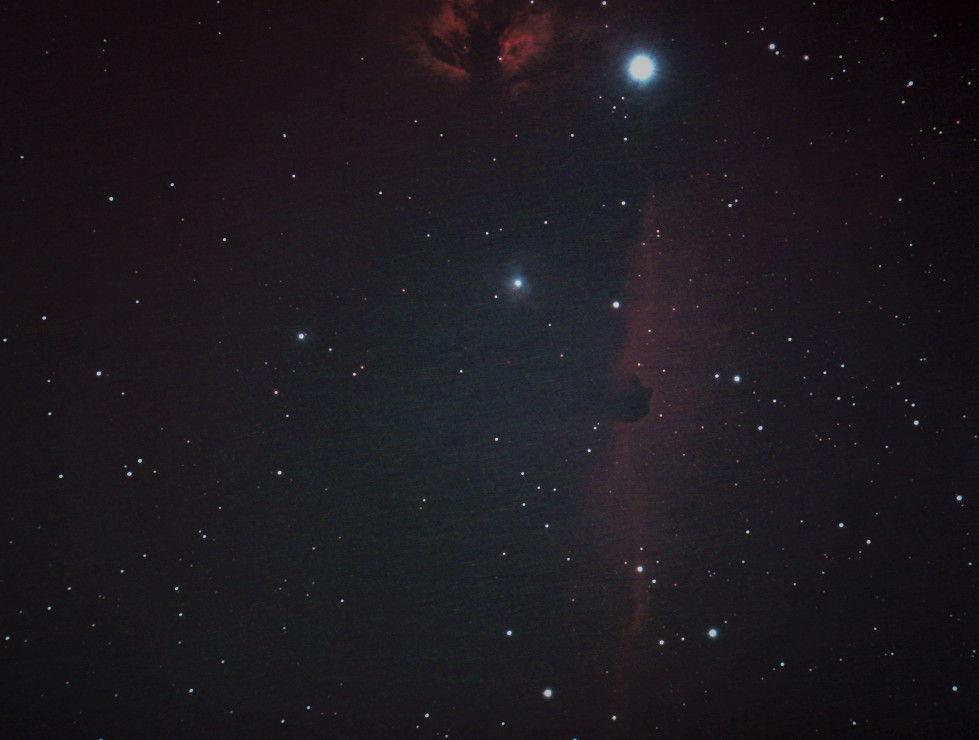
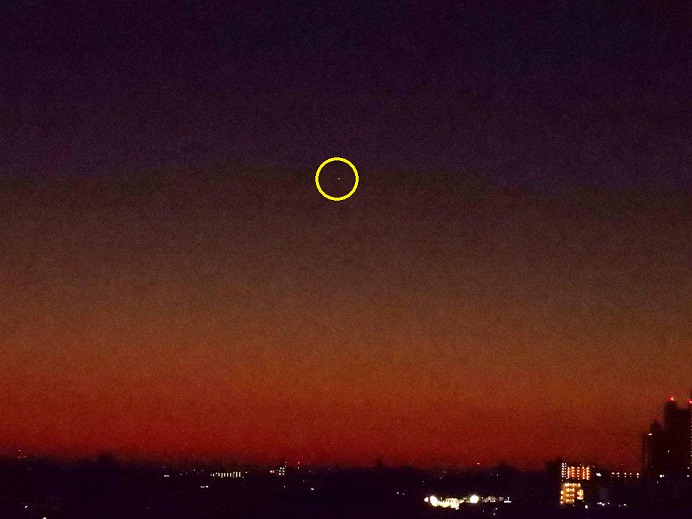
M42 オリオン大星雲
コメントを残す
ソースからインストール
python3でcv2をimportすると crashしてコアーダンプ。
問題の解決:export OPENBLAS_CORETYPE=ARMV8
こちらを参照して解決。Jetson NanoのPython3環境でIllegal instruction (cpre dumped)
処理速度の比較測定:約3倍
$ sudo nvpmodel -m 0
$ sudo jetson_clocks
$ python3 opencv_cuda.py
CPU = 2.7655137538909913[msec]
GPU = 1.0501614570617677[msec]
1
$ python3 opencv_cuda.py
CPU = 2.7816075325012206[msec]
GPU = 0.9869620561599731[msec]
1
opencv_cuda.py
import sys
import time
import cv2

### VALUES
NUM_REPEAT = 10000

### Read source image
img_src = cv2.imread("resource/lena.jpg")
cv2.imshow('img_src', img_src)


### Run with CPU
time_start = time.time()
for i in range (NUM_REPEAT):
    img_dst = cv2.resize(img_src, (300, 300))
time_end = time.time()
print ("CPU = {0}".format((time_end - time_start) * 1000 / NUM_REPEAT) + "[msec]")
cv2.imshow('CPU', img_dst)


### Run with GPU
img_gpu_src = cv2.cuda_GpuMat() # Allocate device memory only once, as memory allocation seems to take time...
img_gpu_dst = cv2.cuda_GpuMat()
time_start = time.time()
for i in range (NUM_REPEAT):
    img_gpu_src.upload(img_src)
    img_gpu_dst = cv2.cuda.resize(img_gpu_src, (300, 300))
    img_dst = img_gpu_dst.download()
time_end = time.time()
print ("GPU = {0}".format((time_end - time_start) * 1000 / NUM_REPEAT) + "[msec]")
cv2.imshow('GPU', img_dst)


key = cv2.waitKey(0)
cv2.destroyAllWindows()

print(cv2.cuda.getCudaEnabledDeviceCount())
cudaで利用できる機能を表示してみる
import cv2
cv2.__version__
dir(cv2.cuda)
['ALPHA_ATOP', 'ALPHA_ATOP_PREMUL', 'ALPHA_IN', 'ALPHA_IN_PREMUL', 'ALPHA_OUT', 'ALPHA_OUT_PREMUL', 'ALPHA_OVER', 'ALPHA_OVER_PREMUL', 'ALPHA_PLUS', 'ALPHA_PLUS_PREMUL', 'ALPHA_PREMUL', 'ALPHA_XOR', 'ALPHA_XOR_PREMUL', 'BroxOpticalFlow_create', 'COLOR_BAYER_BG2BGR_MHT', 'COLOR_BAYER_BG2GRAY_MHT', 'COLOR_BAYER_BG2RGB_MHT', 'COLOR_BAYER_GB2BGR_MHT', 'COLOR_BAYER_GB2GRAY_MHT', 'COLOR_BAYER_GB2RGB_MHT', 'COLOR_BAYER_GR2BGR_MHT', 'COLOR_BAYER_GR2GRAY_MHT', 'COLOR_BAYER_GR2RGB_MHT', 'COLOR_BAYER_RG2BGR_MHT', 'COLOR_BAYER_RG2GRAY_MHT', 'COLOR_BAYER_RG2RGB_MHT', 'COLOR_BayerBG2BGR_MHT', 'COLOR_BayerBG2GRAY_MHT', 'COLOR_BayerBG2RGB_MHT', 'COLOR_BayerGB2BGR_MHT', 'COLOR_BayerGB2GRAY_MHT', 'COLOR_BayerGB2RGB_MHT', 'COLOR_BayerGR2BGR_MHT', 'COLOR_BayerGR2GRAY_MHT', 'COLOR_BayerGR2RGB_MHT', 'COLOR_BayerRG2BGR_MHT', 'COLOR_BayerRG2GRAY_MHT', 'COLOR_BayerRG2RGB_MHT', 'CascadeClassifier_create', 'DEVICE_INFO_COMPUTE_MODE_DEFAULT', 'DEVICE_INFO_COMPUTE_MODE_EXCLUSIVE', 'DEVICE_INFO_COMPUTE_MODE_EXCLUSIVE_PROCESS', 'DEVICE_INFO_COMPUTE_MODE_PROHIBITED', 'DYNAMIC_PARALLELISM', 'DensePyrLKOpticalFlow_create', 'DescriptorMatcher_createBFMatcher', 'DeviceInfo_ComputeModeDefault', 'DeviceInfo_ComputeModeExclusive', 'DeviceInfo_ComputeModeExclusiveProcess', 'DeviceInfo_ComputeModeProhibited', 'EVENT_BLOCKING_SYNC', 'EVENT_DEFAULT', 'EVENT_DISABLE_TIMING', 'EVENT_INTERPROCESS', 'Event_BLOCKING_SYNC', 'Event_DEFAULT', 'Event_DISABLE_TIMING', 'Event_INTERPROCESS', 'Event_elapsedTime', 'FEATURE_SET_COMPUTE_10', 'FEATURE_SET_COMPUTE_11', 'FEATURE_SET_COMPUTE_12', 'FEATURE_SET_COMPUTE_13', 'FEATURE_SET_COMPUTE_20', 'FEATURE_SET_COMPUTE_21', 'FEATURE_SET_COMPUTE_30', 'FEATURE_SET_COMPUTE_32', 'FEATURE_SET_COMPUTE_35', 'FEATURE_SET_COMPUTE_50', 'FarnebackOpticalFlow_create', 'FastFeatureDetector_create', 'GLOBAL_ATOMICS', 'GpuMat_defaultAllocator', 'GpuMat_setDefaultAllocator', 'HOG_create', 'HOST_MEM_PAGE_LOCKED', 'HOST_MEM_SHARED', 'HOST_MEM_WRITE_COMBINED', 'HostMem_PAGE_LOCKED', 'HostMem_SHARED', 'HostMem_WRITE_COMBINED', 'NATIVE_DOUBLE', 'NVIDIA_OPTICAL_FLOW_1_0_NV_OF_PERF_LEVEL_FAST', 'NVIDIA_OPTICAL_FLOW_1_0_NV_OF_PERF_LEVEL_MAX', 'NVIDIA_OPTICAL_FLOW_1_0_NV_OF_PERF_LEVEL_MEDIUM', 'NVIDIA_OPTICAL_FLOW_1_0_NV_OF_PERF_LEVEL_SLOW', 'NVIDIA_OPTICAL_FLOW_1_0_NV_OF_PERF_LEVEL_UNDEFINED', 'NvidiaOpticalFlow_1_0_NV_OF_PERF_LEVEL_FAST', 'NvidiaOpticalFlow_1_0_NV_OF_PERF_LEVEL_MAX', 'NvidiaOpticalFlow_1_0_NV_OF_PERF_LEVEL_MEDIUM', 'NvidiaOpticalFlow_1_0_NV_OF_PERF_LEVEL_SLOW', 'NvidiaOpticalFlow_1_0_NV_OF_PERF_LEVEL_UNDEFINED', 'NvidiaOpticalFlow_1_0_create', 'ORB_create', 'OpticalFlowDual_TVL1_create', 'SHARED_ATOMICS', 'SURF_CUDA_ANGLE_ROW', 'SURF_CUDA_HESSIAN_ROW', 'SURF_CUDA_LAPLACIAN_ROW', 'SURF_CUDA_OCTAVE_ROW', 'SURF_CUDA_ROWS_COUNT', 'SURF_CUDA_SIZE_ROW', 'SURF_CUDA_X_ROW', 'SURF_CUDA_Y_ROW', 'SparsePyrLKOpticalFlow_create', 'StereoBeliefPropagation_estimateRecommendedParams', 'StereoConstantSpaceBP_estimateRecommendedParams', 'Stream_Null', 'TargetArchs_has', 'TargetArchs_hasBin', 'TargetArchs_hasEqualOrGreater', 'TargetArchs_hasEqualOrGreaterBin', 'TargetArchs_hasEqualOrGreaterPtx', 'TargetArchs_hasEqualOrLessPtx', 'TargetArchs_hasPtx', 'WARP_SHUFFLE_FUNCTIONS', '__doc__', '__loader__', '__name__', '__package__', '__spec__', 'abs', 'absSum', 'absdiff', 'add', 'addWeighted', 'alphaComp', 'bilateralFilter', 'bitwise_and', 'bitwise_not', 'bitwise_or', 'bitwise_xor', 'blendLinear', 'buildWarpAffineMaps', 'buildWarpPerspectiveMaps', 'calcAbsSum', 'calcHist', 'calcNorm', 'calcNormDiff', 'calcSqrSum', 'calcSum', 'cartToPolar', 'compare', 'copyMakeBorder', 'countNonZero', 'createBackgroundSubtractorMOG', 'createBackgroundSubtractorMOG2', 'createBoxFilter', 'createBoxMaxFilter', 'createBoxMinFilter', 'createCLAHE', 'createCannyEdgeDetector', 'createColumnSumFilter', 'createContinuous', 'createConvolution', 'createDFT', 'createDerivFilter', 'createDisparityBilateralFilter', 'createGaussianFilter', 'createGeneralizedHoughBallard', 'createGeneralizedHoughGuil', 'createGoodFeaturesToTrackDetector', 'createHarrisCorner', 'createHoughCirclesDetector', 'createHoughLinesDetector', 'createHoughSegmentDetector', 'createLaplacianFilter', 'createLinearFilter', 'createLookUpTable', 'createMedianFilter', 'createMinEigenValCorner', 'createMorphologyFilter', 'createRowSumFilter', 'createScharrFilter', 'createSeparableLinearFilter', 'createSobelFilter', 'createStereoBM', 'createStereoBeliefPropagation', 'createStereoConstantSpaceBP', 'createTemplateMatching', 'cvtColor', 'demosaicing', 'dft', 'divide', 'drawColorDisp', 'ensureSizeIsEnough', 'equalizeHist', 'evenLevels', 'exp', 'findMinMax', 'findMinMaxLoc', 'flip', 'gammaCorrection', 'gemm', 'getCudaEnabledDeviceCount', 'getDevice', 'histEven', 'histRange', 'integral', 'log', 'magnitude', 'magnitudeSqr', 'max', 'meanShiftFiltering', 'meanShiftProc', 'meanShiftSegmentation', 'meanStdDev', 'merge', 'min', 'minMax', 'minMaxLoc', 'mulAndScaleSpectrums', 'mulSpectrums', 'multiply', 'norm', 'normalize', 'phase', 'polarToCart', 'pow', 'printCudaDeviceInfo', 'printShortCudaDeviceInfo', 'pyrDown', 'pyrUp', 'rectStdDev', 'reduce', 'registerPageLocked', 'remap', 'reprojectImageTo3D', 'resetDevice', 'resize', 'rotate', 'setBufferPoolConfig', 'setBufferPoolUsage', 'setDevice', 'split', 'sqr', 'sqrIntegral', 'sqrSum', 'sqrt', 'subtract', 'sum', 'threshold', 'transpose', 'unregisterPageLocked', 'warpAffine', 'warpPerspective']
参考URL(ラズパイ+BME280で温度・湿度・気圧を計測(BMP280は湿度なし)
次のpythonコードをcronで定期的(例えば3分毎)に実行し、influxdbのホストへ送信する。
#coding: utf-8
#encoding: utf-8

from influxdb import InfluxDBClient
client = InfluxDBClient(host='xxx.xxx.xxx.xxx', port=8086, username='****', password='****', database='iot01')
measurement = 'air5'
tags = {'place': 'leaf-bme280','host': 'RockPi4'}

from smbus2 import SMBus
import time

bus_number  = 7 # RockPi4の場合。 Raspiでは 1
i2c_address = 0x76

bus = SMBus(bus_number)

digT = []
digP = []
digH = []

t_fine = 0.0

def writeReg(reg_address, data):
        bus.write_byte_data(i2c_address,reg_address,data)

def get_calib_param():
        calib = []

        for i in range (0x88,0x88+24):
                calib.append(bus.read_byte_data(i2c_address,i))
        calib.append(bus.read_byte_data(i2c_address,0xA1))
        for i in range (0xE1,0xE1+7):
                calib.append(bus.read_byte_data(i2c_address,i))

        digT.append((calib[1] << 8) | calib[0])
        digT.append((calib[3] << 8) | calib[2])
        digT.append((calib[5] << 8) | calib[4])
        digP.append((calib[7] << 8) | calib[6])
        digP.append((calib[9] << 8) | calib[8])
        digP.append((calib[11]<< 8) | calib[10])
        digP.append((calib[13]<< 8) | calib[12])
        digP.append((calib[15]<< 8) | calib[14])
        digP.append((calib[17]<< 8) | calib[16])
        digP.append((calib[19]<< 8) | calib[18])
        digP.append((calib[21]<< 8) | calib[20])
        digP.append((calib[23]<< 8) | calib[22])
        digH.append( calib[24] )
        digH.append((calib[26]<< 8) | calib[25])
        digH.append( calib[27] )
        digH.append((calib[28]<< 4) | (0x0F & calib[29]))
        digH.append((calib[30]<< 4) | ((calib[29] >> 4) & 0x0F))
        digH.append( calib[31] )

        for i in range(1,2):
                if digT[i] & 0x8000:
                        digT[i] = (-digT[i] ^ 0xFFFF) + 1

        for i in range(1,8):
                if digP[i] & 0x8000:
                        digP[i] = (-digP[i] ^ 0xFFFF) + 1

        for i in range(0,6):
                if digH[i] & 0x8000:
                        digH[i] = (-digH[i] ^ 0xFFFF) + 1

def readData():
        data = []
        for i in range (0xF7, 0xF7+8):
                data.append(bus.read_byte_data(i2c_address,i))
        pres_raw = (data[0] << 12) | (data[1] << 4) | (data[2] >> 4)
        temp_raw = (data[3] << 12) | (data[4] << 4) | (data[5] >> 4)
        hum_raw  = (data[6] << 8)  |  data[7]

        temp = compensate_T(temp_raw)
        pres = compensate_P(pres_raw)
        humi = compensate_H(hum_raw)
        print (round(temp,2))
        print (round(pres,2))
        print (round(humi,2))
        json_body = [
                {
                        'measurement': measurement,
                        'tags': tags,
                        'fields': {'temp': round(temp,2) , 'humi': round(humi,2) , 'hpa': round(pres,2)}
                }
        ]
        client.write_points(json_body)
        print(json_body)


def compensate_P(adc_P):
        global  t_fine
        pressure = 0.0

        v1 = (t_fine / 2.0) - 64000.0
        v2 = (((v1 / 4.0) * (v1 / 4.0)) / 2048) * digP[5]
        v2 = v2 + ((v1 * digP[4]) * 2.0)
        v2 = (v2 / 4.0) + (digP[3] * 65536.0)
        v1 = (((digP[2] * (((v1 / 4.0) * (v1 / 4.0)) / 8192)) / 8)  + ((digP[1] * v1) / 2.0)) / 262144
        v1 = ((32768 + v1) * digP[0]) / 32768

        if v1 == 0:
                return 0
        pressure = ((1048576 - adc_P) - (v2 / 4096)) * 3125
        if pressure < 0x80000000:
                pressure = (pressure * 2.0) / v1
        else:
                pressure = (pressure / v1) * 2
        v1 = (digP[8] * (((pressure / 8.0) * (pressure / 8.0)) / 8192.0)) / 4096
        v2 = ((pressure / 4.0) * digP[7]) / 8192.0
        pressure = pressure + ((v1 + v2 + digP[6]) / 16.0)

        return (pressure/100)
        #print "pressure : %7.2f hPa" % (pressure/100)

def compensate_T(adc_T):
        global t_fine
        v1 = (adc_T / 16384.0 - digT[0] / 1024.0) * digT[1]
        v2 = (adc_T / 131072.0 - digT[0] / 8192.0) * (adc_T / 131072.0 - digT[0] / 8192.0) * digT[2]
        t_fine = v1 + v2
        temperature = t_fine / 5120.0

        return temperature
        #print "temp : %-6.2f ℃" % (temperature)

def compensate_H(adc_H):
        global t_fine
        var_h = t_fine - 76800.0
        if var_h != 0:
                var_h = (adc_H - (digH[3] * 64.0 + digH[4]/16384.0 * var_h)) * (digH[1] / 65536.0 * (1.0 + digH[5] / 67108864.0 * var_h * (1.0 + digH[2] / 67108864.0 * var_h)))
        else:
                return 0
        var_h = var_h * (1.0 - digH[0] * var_h / 524288.0)
        if var_h > 100.0:
                var_h = 100.0
        elif var_h < 0.0:
                var_h = 0.0

        return var_h
        #print "hum : %6.2f %" % (var_h)

def setup():
        osrs_t = 1                      #Temperature oversampling x 1
        osrs_p = 1                      #Pressure oversampling x 1
        osrs_h = 1                      #Humidity oversampling x 1
        mode   = 3                      #Normal mode
        t_sb   = 5                      #Tstandby 1000ms
        filter = 0                      #Filter off
        spi3w_en = 0                    #3-wire SPI Disable

        ctrl_meas_reg = (osrs_t << 5) | (osrs_p << 2) | mode
        config_reg    = (t_sb << 5) | (filter << 2) | spi3w_en
        ctrl_hum_reg  = osrs_h

        writeReg(0xF2,ctrl_hum_reg)
        writeReg(0xF4,ctrl_meas_reg)
        writeReg(0xF5,config_reg)

setup()
get_calib_param()

if __name__ == '__main__':
        try:
                readData()
        except KeyboardInterrupt:
pass参考URL Armoris日記 ラズパイと BME280 で温度・湿度・気圧を測って グラフ化して表示する
Raspberry Pi4B 32biOSの場合
$ uname -a
Linux ps2 5.10.63-v7l+ #1457 SMP Tue Sep 28 11:26:14 BST 2021 armv7l GNU/Linux
コンパイル時に次を設定
$ GOOS=linux && GOARCH=arm && GOARM=6
const recordIntervalSec = 180で、データを投げる周期を指定します。(自分の環境では $HOME/influx/配下に配置)
package main

import (
    "context"
    "fmt"
    "time"

    influxdb2 "github.com/influxdata/influxdb-client-go/v2"
    "github.com/influxdata/influxdb-client-go/v2/api"
    "github.com/quhar/bme280"
    "golang.org/x/exp/io/i2c"
)

func initBme280() (*bme280.BME280, error) {
    d, err := i2c.Open(&i2c.Devfs{Dev: "/dev/i2c-1"}, 0x76) // 0x76は今回使用す るBME280のI2Cアドレス
    if err != nil {
        return nil, err
    }

    b := bme280.New(d)
    err = b.Init()
    return b, err
}

func recordSensorValues(b *bme280.BME280, w api.WriteAPIBlocking, measurement string) (err error) {
    t, p, h, err := b.EnvData()
    if err != nil {
        return
    }
    point := influxdb2.NewPoint(
        measurement,
        map[string]string{},
        map[string]interface{}{
            "temperature": t,
            "humidity":    h,
            "pressure":    p,
        },
        time.Now(),
    )
    err = w.WritePoint(context.Background(), point)
    if err != nil {
        return
    }
    fmt.Printf("Temp: %.2fC, Hum: %.2f%%, Press: %.2fhpa\n", t, h, p)
    return
}

func main() {
    const influxURL = "http://xxx.xxx.xxx.xxx:8086"      // InfluxDB APIのURL
    const userName = "*****"                      // influxDBのUser名
    const password = "*****"                       // influxDBのUserのPassword
    const db = "iot01"                             // influxDBのDatabase
    const measurement = "sensors"                  // influxDBのMeasurement(存在しない場合は実行時に生成される)
    const recordIntervalSec = 180                  // 値を書き込む間隔(秒)

    b, err := initBme280()
    if err != nil {
        panic(err)
    }
    c := influxdb2.NewClient(influxURL, fmt.Sprintf("%s:%s", userName, password))
    w := c.WriteAPIBlocking("", db+"/autogen")

    ticker := time.NewTicker(recordIntervalSec * time.Second)
    defer ticker.Stop()
    for {
        select {
        case <-ticker.C:
            err = recordSensorValues(b, w, measurement)
            if err != nil {
                panic(err)
            }
        }
    }
}
RockPi4で64bit OSの場合
$ uname -a
Linux rock 4.4.154-110-rockchip-gcef30e88a9f5 #1 SMP Mon Jun 22 07:37:10 UTC 2020 aarch64 aarch64 aarch64 GNU/Linux
aptでインストールしたgolangのバージョンが古いので、新しいバージョンを取得
$ GOOS=linux && GOARCH=arm64 && GOARM=6 でコンパイルはできるが、実行時にエラーとなる。(chip IDが違うよ! というエラー)
mars@rock:~/influx$ ~/go/bin/go build iot-sensor-logger.go
go: downloading github.com/influxdata/influxdb-client-go/v2 v2.5.1
go: downloading golang.org/x/net v0.0.0-20210119194325-5f4716e94777
go: downloading github.com/deepmap/oapi-codegen v1.8.2
go: downloading github.com/pkg/errors v0.9.1
go: downloading gopkg.in/yaml.v2 v2.3.0
go: downloading github.com/influxdata/line-protocol v0.0.0-20200327222509-2487e7298839

$ ./iot-sensor-logger
panic: chip ID is different than expected, want(60), got(58)

goroutine 1 [running]:
main.main()
        /home/mars/influx/iot-sensor-logger.go:58 +0x1bc
自分の環境では、実行時にエラーとなってデータを取得できない。 GOARM=7も試してみたがNG。コンパイルで生成されたコードの情報は、問題なさそうなので、参照しているライブラリーに問題があるのか???
$ file iot-sensor-logger
iot-sensor-logger: ELF 64-bit LSB executable, ARM aarch64, version 1 (SYSV), dynamically linked, interpreter /lib/ld-linux-aarch64.so.1, not stripped
ちなみに、【Golang】がサポートしている GOOS と GOARCH の一覧
$ go tool dist list
aix/ppc64
android/386
android/amd64
android/arm
android/arm64
darwin/amd64
darwin/arm64
dragonfly/amd64
freebsd/386
freebsd/amd64
freebsd/arm
freebsd/arm64
illumos/amd64
ios/amd64
ios/arm64
js/wasm
linux/386
linux/amd64
linux/arm
linux/arm64
linux/mips
linux/mips64
linux/mips64le
linux/mipsle
linux/ppc64
linux/ppc64le
linux/riscv64
linux/s390x
netbsd/386
netbsd/amd64
netbsd/arm
netbsd/arm64
openbsd/386
openbsd/amd64
openbsd/arm
openbsd/arm64
openbsd/mips64
plan9/386
plan9/amd64
plan9/arm
solaris/amd64
windows/386
windows/amd64
windows/arm
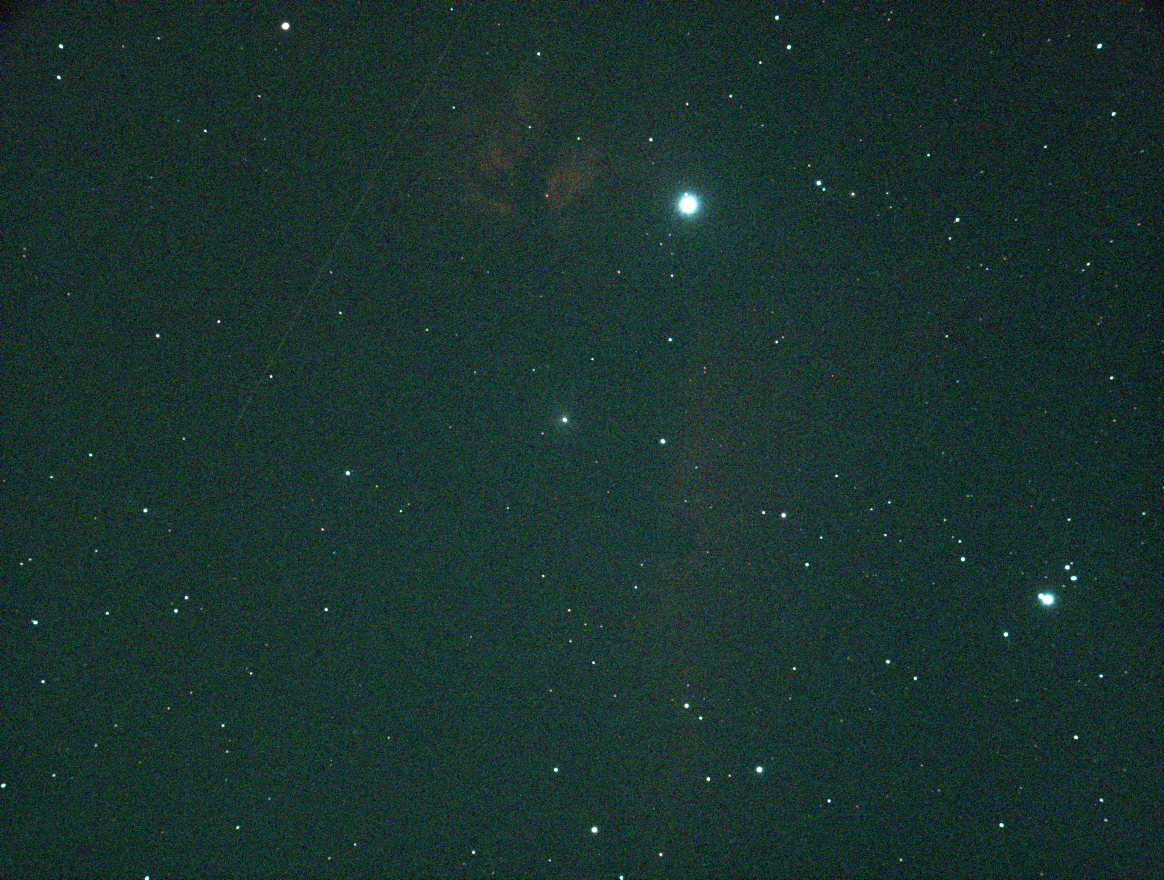
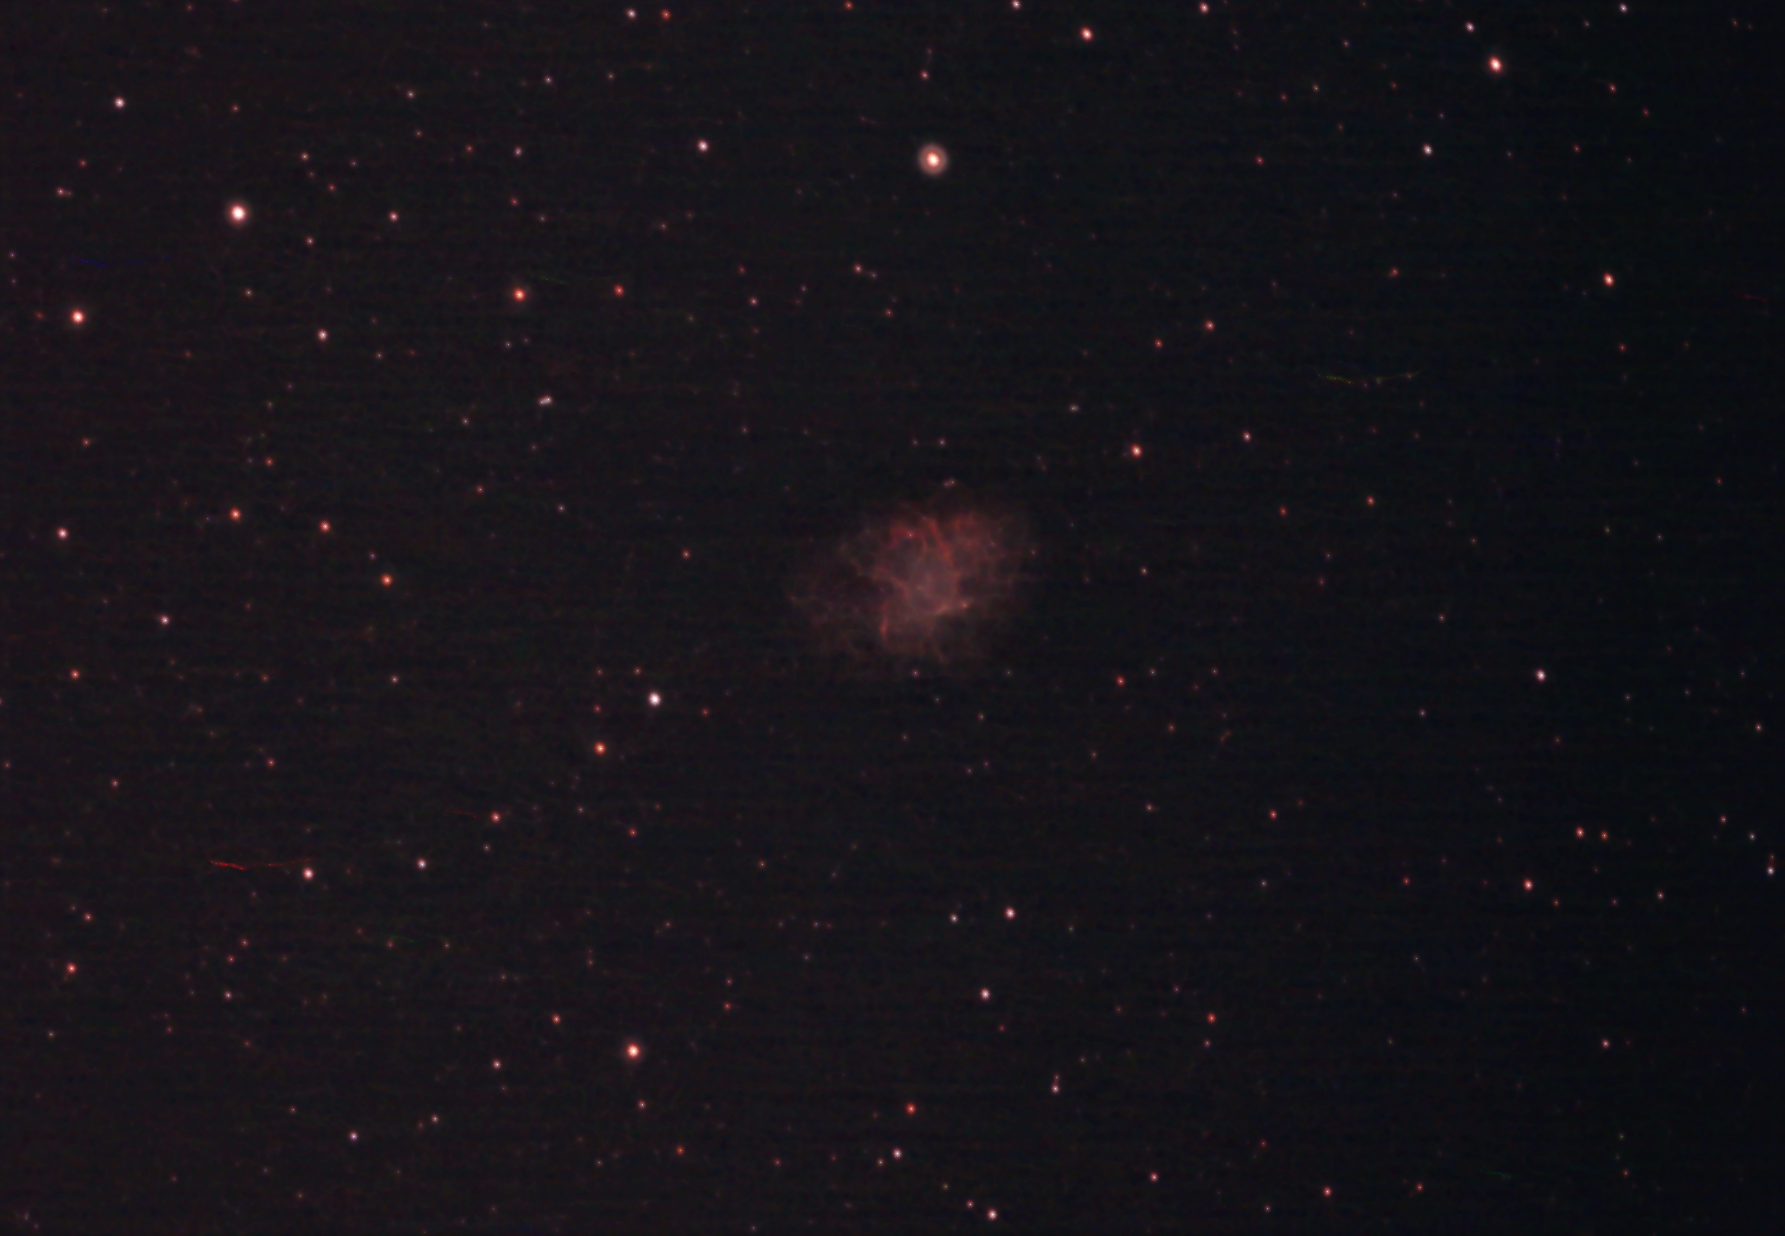
windows/arm64おうし座/超新星残骸、かに星雲
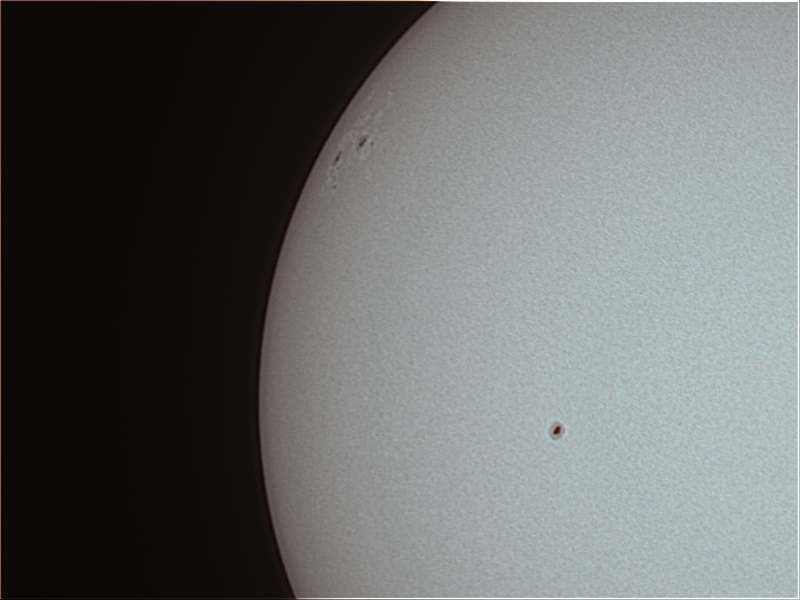
現代では、M1は西暦1054年に出現した超新星の残骸であることがわかっています。爆発した星の中心核は中性子星(16等)として残っていて、約1/30秒周期で電波やX線を出すパルサーとして有名です。
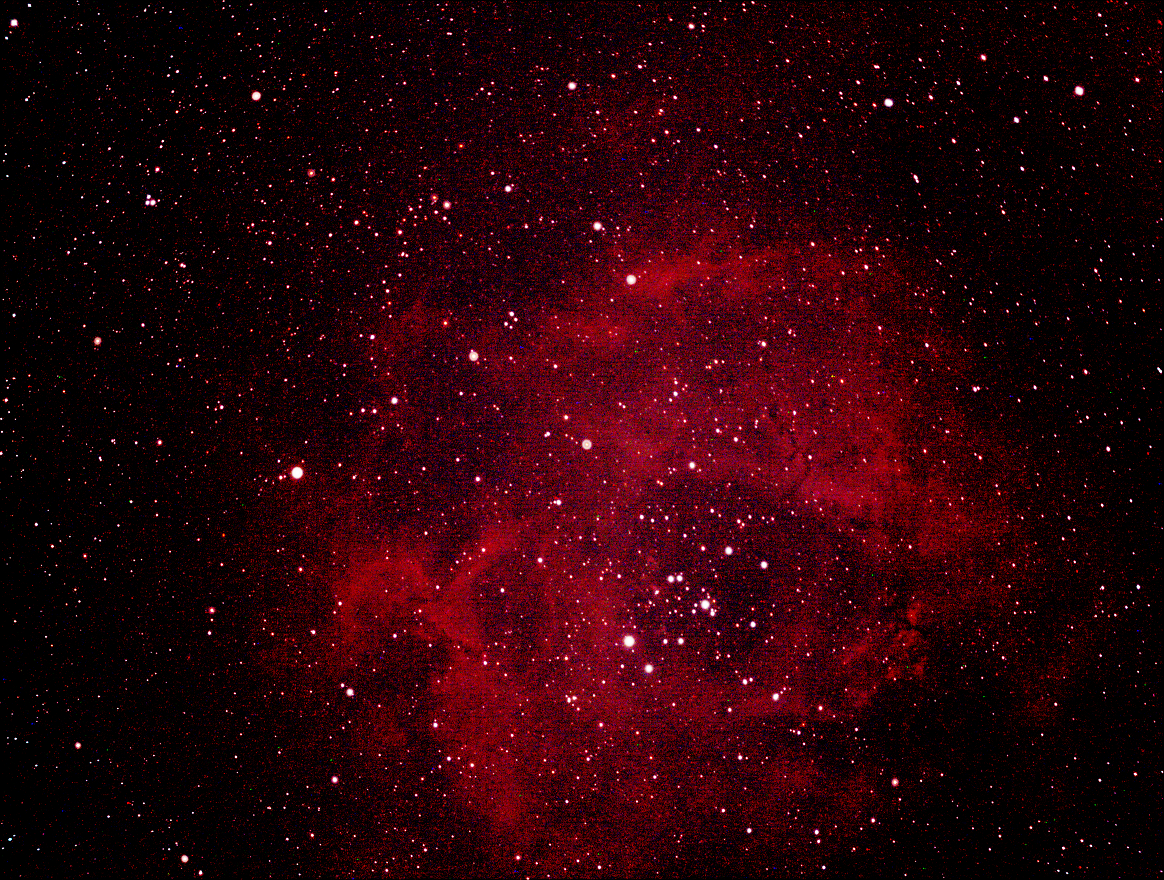
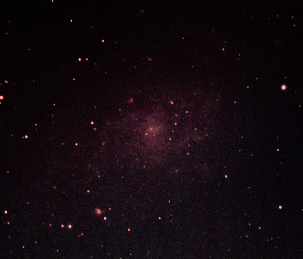
いっかくじゅう座のバラ星雲
オリオン座の隣には、 いっかくじゅう座という星座が輝いていますが、 暗い星ばかりで構成されているため、知名度は低く、存在を知らない方も多い星座です。 しかし、そのいっかくじゅう座の中には、薔薇とそっくりな形をした「ばら星雲」が輝いていて、こちらの天体の方が有名になっています。 ばら星雲は天体写真ファンの人気の被写体で、写真に撮ると赤っぽい色合いに写り、本当のばらの花が咲いたような姿を楽しめます。
ーーーー
8秒露光、104枚スタック
https://github.com/ashtreefarms/bme280-exporter
CPUがrock Pi4の場合、I2Cバス番号が7なので、一部修正が必要
$ /home/mars/.pyenv/versions/3.8.10/bin/bme280_exporter -a 0x76
2021-09-30 14:07:43,226 - initializing BME280 at 0x76 filter: 0 oversampling(h: 4, p: 4, t: 4)
2021-09-30 14:07:43,259 - initializing exporter with labels None
2021-09-30 14:07:43,260 - starting exporter on port 9500
2021-09-30 14:07:43,267 - starting sampling with 2.0s interval
2021-09-30 14:07:43,295 - temp: 30.31 C   humidity: 0.00%   pressure: 998.05 hPa
2021-09-30 14:07:45,302 - temp: 30.33 C   humidity: 0.00%   pressure: 998.02 hPa
2021-09-30 14:07:47,310 - temp: 30.34 C   humidity: 0.00%   pressure: 998.01 hPa
修正箇所 Adafruit_GPIO/I2C.py
def get_default_bus():
    """Return the default bus number based on the device platform.  For a
    Raspberry Pi either bus 0 or 1 (based on the Pi revision) will be returned.
    For a Beaglebone Black the first user accessible bus, 1, will be returned.
    """
    return 7
Usage
$ bme280_exporter -h
usage: bme280_exporter [-h] [-v] [-p PORT] [-a ADDRESS] [-l LABELS]
                       [-i INTERVAL] [-f FILTER] [-ho HO] [-po PO] [-to TO]

optional arguments:
  -h, --help            show this help message and exit
  -v, --verbose         increase output verbosity
  -p PORT, --port PORT  exporter port (default: 9500
  -a ADDRESS, --address ADDRESS
                        BME280 I2C address (default: 0x77)
  -l LABELS, --labels LABELS
                        JSON object of Prometheus labels to apply
  -i INTERVAL, --interval INTERVAL
                        measurement sample interval (default: 2)
  -f FILTER, --filter FILTER
                        filter value to apply (0-4, default: 0)
  -ho HO                humidity oversampling value (1-5, default: 4)
  -po PO                pressure oversampling value (1-5, default: 4)
  -to TO                temperature oversampling value (1-5, default: 4)